Worn or contaminated fuel injectors are one of the most common causes of power loss, rough idle, and excessive smoke on Kioti CK series tractors. This step-by-step guide covers how to remove, inspect, and replace injectors on the CK2510, CK3510, and CK4010 and how to bleed the fuel system correctly afterwards.
The Daedong diesel engines fitted to the Kioti CK series use mechanical fuel injectors that deliver precisely timed fuel sprays into the combustion chamber. Over time these injectors wear, clog, or lose their calibrated spray pattern. The result is a tractor that runs rough, blows black or white smoke, lacks its former pull, or is hard to start despite everything else checking out.
This guide is written for confident DIY owners. Injector replacement on the CK series is achievable without specialist equipment, but fuel system work requires care and cleanliness throughout. Read the full guide before starting.
How do I know if my injectors need replacing?
| Symptom | What it suggests |
|---|---|
| Black exhaust smoke under load | Injector delivering too much fuel or poor atomisation |
| White smoke that persists after warm-up | Injector dribbling — fuel not fully combusting |
| Rough, uneven idle | One or more injectors not firing correctly |
| Power loss on hills or under load | Insufficient or uneven fuel delivery |
| Hard starting despite good glow plugs and battery | Injectors not holding pressure or spray pattern degraded |
| Engine knocking or "diesel knock" at idle | Late injection timing caused by worn nozzle |
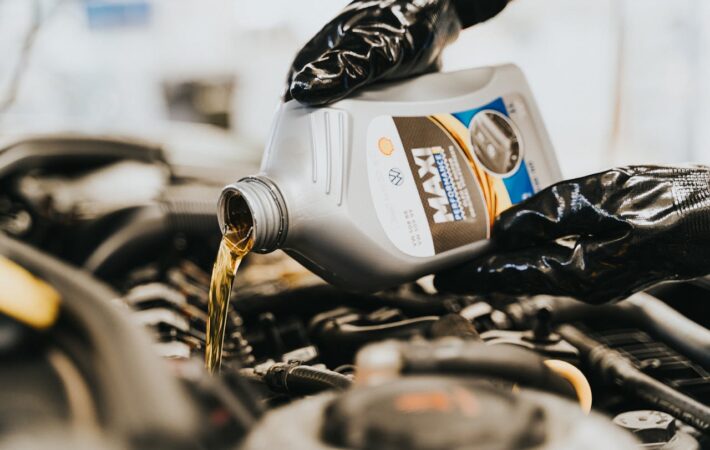
⚠️ Before replacing injectors: Rule out the simpler culprits first; a blocked fuel filter, clogged air filter, or contaminated diesel tank can produce identical symptoms. Replace the fuel filter and bleed the system before committing to injector work.
Important: Common rail vs. mechanical injectors
The CK series spans multiple production years and two different fuel system types. This is critical to identify before ordering parts or attempting the job yourself.
Earlier CK2510, CK3510, and CK4010 models (pre-2021, Tier 2/3 engines) use traditional mechanical injectors which are simpler, lower pressure units that can be replaced by a competent owner with basic tools. Later Tier 4 models with DPF systems use common rail injectors operating at very high pressure. Common rail injectors require ECU reprogramming by a Kioti dealer after replacement so this is not a DIY job.
⚠️ Common rail injector warning: If your tractor is a 2021 or newer CK model, or is fitted with a DPF exhaust, do not attempt to replace injectors without dealer involvement. Each new common rail injector has a unique calibration code that must be programmed into the ECU before the engine will run correctly. Skipping this step will result in poor running or engine damage.
To confirm which system your tractor has, check the engine serial number plate and compare with your operator’s manual, or contact a Kioti dealer with the serial number.
Tools and parts needed
Tools Required
- ✅ Socket set and ratchet
- ✅ Open-ended spanners (17mm, 19mm)
- ✅ Injector line wrench (line spanner)
- ✅ Torque wrench
- ✅ Clean lint-free rags
- ✅ Diesel-safe container for fuel catchment
- ✅ Compressed air (optional but recommended)
- ✅ Marker or paint pen (to label lines)
Parts to have Ready
- ✅ Replacement fuel injector(s) — confirm part number against engine serial
- ✅ Injector copper sealing washers (crush washers) — always replace, never reuse
- ✅ New fuel line sealing washers if disturbing banjo fittings
- ✅ Fuel filter (good time to replace simultaneously)
- ✅ Clean diesel for flushing
📌 Part number note: The CK2510, CK3510, and CK4010 do not all share the same injector. Always confirm the correct part number using your engine serial number, not just the tractor model. Injector specifications changed between some production runs on the same model.
Step-by-step: Replacing the fuel injectors
1️⃣ Prepare the engine and work area
Allow the engine to cool fully. Never work on the fuel system on a hot engine. Turn the fuel cock to the closed (off) position. Clean the area around the injectors and fuel lines thoroughly with compressed air or a clean rag. Diesel contamination inside the combustion chamber from a dropped bolt or debris can cause serious damage. Lay clean rags around the work area to catch any fuel spillage.
2️⃣ Label and disconnect the high-pressure fuel lines
Before touching anything, use a marker to label each high-pressure fuel line where it connects to the injector. Mark them 1, 2, and 3 from front to back. On a 3-cylinder CK engine you will have three lines running from the injection pump to each injector. Using an injector line spanner (a split ring spanner designed for fuel lines), carefully loosen each line nut at the injector end. Do not use standard open-ended spanners, they will round the nuts. Place a rag under each connection to catch residual fuel.
3️⃣ Remove the leak-off return line
Each injector has a small leak-off pipe on top which is a narrow fuel return line that loops across all three injectors and returns excess fuel to the tank. This is typically held by small banjo bolts or clipped unions. Remove this carefully and set it aside. Plug the open ends with clean rags or caps to prevent contamination entering the line.
4️⃣ Remove the injector hold-down clamps and nuts
Each injector is held in the cylinder head by a clamp and two studs with nuts, or in some variants by a single central bolt. Remove the nuts or bolt (typically 12mm or 14mm) and lift the clamp away. Keep all hardware in a labelled container so nothing gets misplaced. If any nuts are corroded, apply a small amount of penetrating oil and allow time to soak before forcing them.
5️⃣ Extract the injector from the head
With the clamp removed, the injector should pull straight out of the head by hand or with gentle rocking. If it is seized in place due to carbon build-up, use a proper injector puller. Never lever against the injector body or fuel connections as this will cause damage. Once removed, immediately cap the injector bore in the head with a clean rag to prevent anything falling in. Remove the old copper sealing washer from the bottom of the bore as it must be replaced with a new one.
6️⃣ Clean the injector bore
Before fitting the new injector, clean the bore in the cylinder head carefully. Use a clean rag on a suitable rod to remove any carbon deposits from the seating surface. Do not use wire brushes or abrasives that could leave debris behind. A clean, undamaged seating surface is essential for a good seal.
7️⃣ Install the new injector
Fit a new copper sealing washer onto the new injector before installation. Lower the injector carefully into the bore, ensuring it seats correctly. Refit the hold-down clamp and tighten the nuts evenly and gradually. Do not overtighten one side before the other, as this will tilt the injector and damage the seal. Tighten to the torque specification in your workshop manual; on most Daedong CK engines this is approximately 20–25 Nm for the clamp nuts. If you do not have the exact specification, consult your operator’s manual or contact your parts supplier.
8️⃣ Reconnect the fuel lines
Reconnect the high-pressure fuel lines to each injector in the correct order. Refer to your labels from Step 2. Hand-tighten the line nuts first to ensure they thread on correctly, then tighten with the line spanner. Do not overtighten as fuel line nuts are typically tightened to around 25–30 Nm. Reconnect the leak-off return line and ensure all banjo bolt washers are in place and new if disturbed.
9️⃣ Bleed the fuel system
This step is essential. Any air remaining in the fuel system after injector work will prevent the engine from starting or cause it to run roughly. Turn the fuel cock to the air-bleed position (where fitted), and allow fuel to displace the air from the filter and lines. Then crack each injector line nut slightly at the injector end, just enough to allow air to escape. Place a rag underneath, and crank the engine in short bursts until a steady stream of fuel (with no bubbles) appears at each connection. Retighten each line nut as you go. Once all three lines are bled, crank the engine to start.
🔟 Start the engine and check for leaks
Once the engine fires, allow it to idle and carefully inspect every fuel connection you disturbed for any signs of drips or weeping. A fuel leak on a hot engine is a fire risk. Tighten any weeping connections carefully. Allow the engine to warm up and check that smoke has cleared, idle has smoothed out, and power feels restored under light load before returning to full work.
When to have injectors professionally tested first
If you are unsure whether all three injectors need replacement or just one, it is worth having them bench-tested by a diesel injection specialist before buying. A bench test confirms opening pressure, spray pattern, and leak-off rate and can identify which injector is failing. This is especially worthwhile given that OEM Kioti injectors for common rail models can cost several hundred dollars each, and even mechanical injectors for the CK series are not cheap parts.
How to find the right injector for your CK model
Injectors are not universal across the CK range. The CK2510 uses a different injector to the CK3510 and CK4010, and there are further differences within each model depending on the engine serial number range. When ordering, always provide your engine serial number, not just the tractor model to confirm the correct part. Our team is happy to check compatibility before dispatch so the right part arrives first time.